
“Automatic YouTube Gallery” is a free, lightweight, modern, and responsive WordPress plugin that allows you to add dynamic YouTube galleries to your website easily.
- Installing Automatic YouTube Gallery
- Configuring the YouTube API Key
- Creating and Displaying Video Galleries
- Using Premium Gallery Layouts like Popup, Slider, and More
- Frequently Asked Questions
- Creating a NASA Video Gallery —
Learn by Example
1. Installing Automatic YouTube Gallery
To get started, install the “Automatic YouTube Gallery” plugin. If it’s already installed, you can skip to the next step.
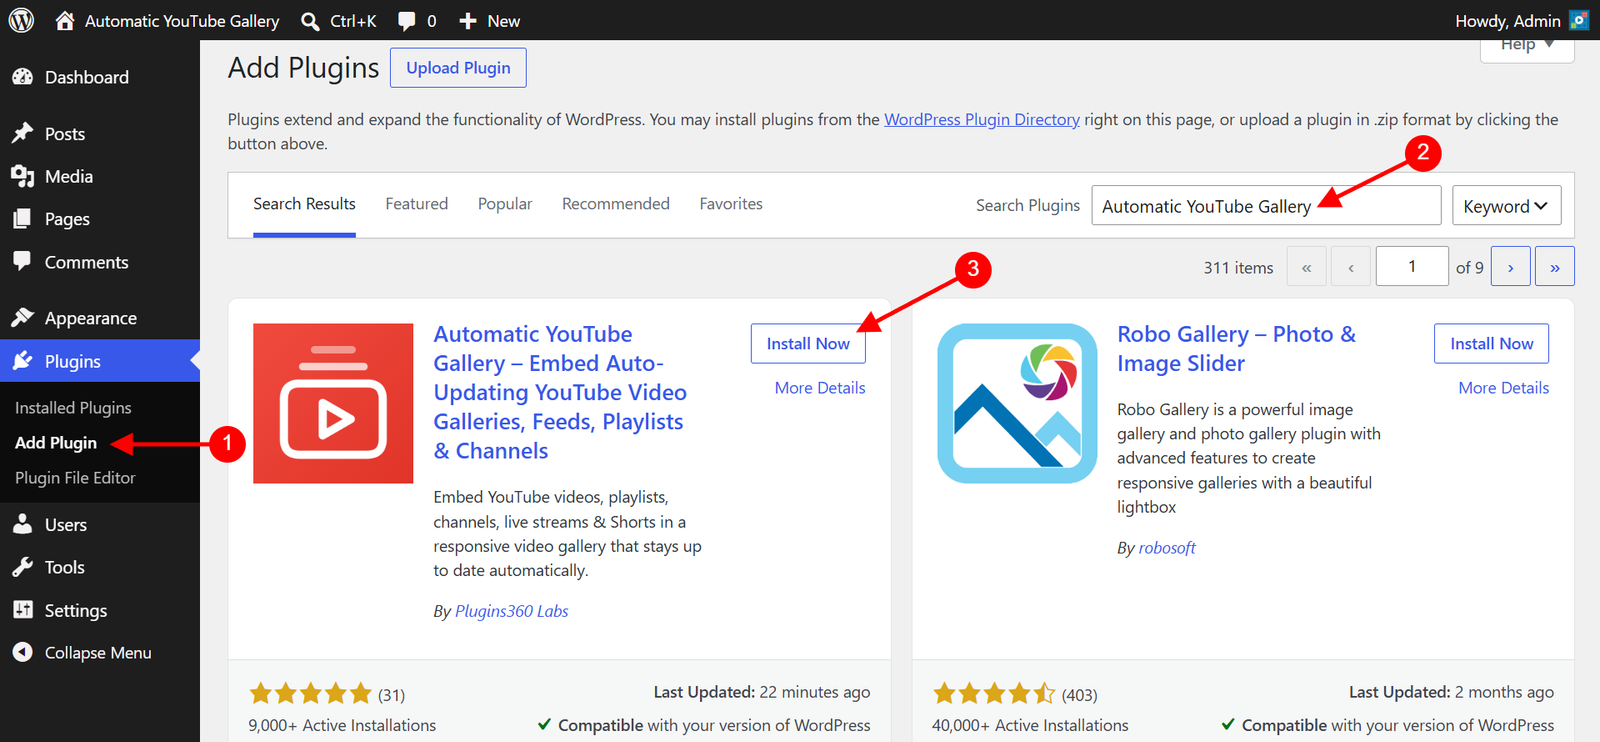
- Navigate to “WordPress Admin Dashboard / Plugins / Add Plugin“.
- In the search box, type “Automatic YouTube Gallery“.
- Locate the “Automatic YouTube Gallery” plugin and click Install Now, then Activate the plugin.
- After activation, you’ll be prompted to opt-in for update notifications. You may choose to opt-in or skip this step; it won’t affect the plugin’s functionality.
2. Configuring the YouTube API Key
The plugin uses the YouTube Data API to dynamically fetch videos from YouTube. An API key is required to use this API, but don’t worry—the API is free! Follow the steps below to create and configure your YouTube API key for the plugin.
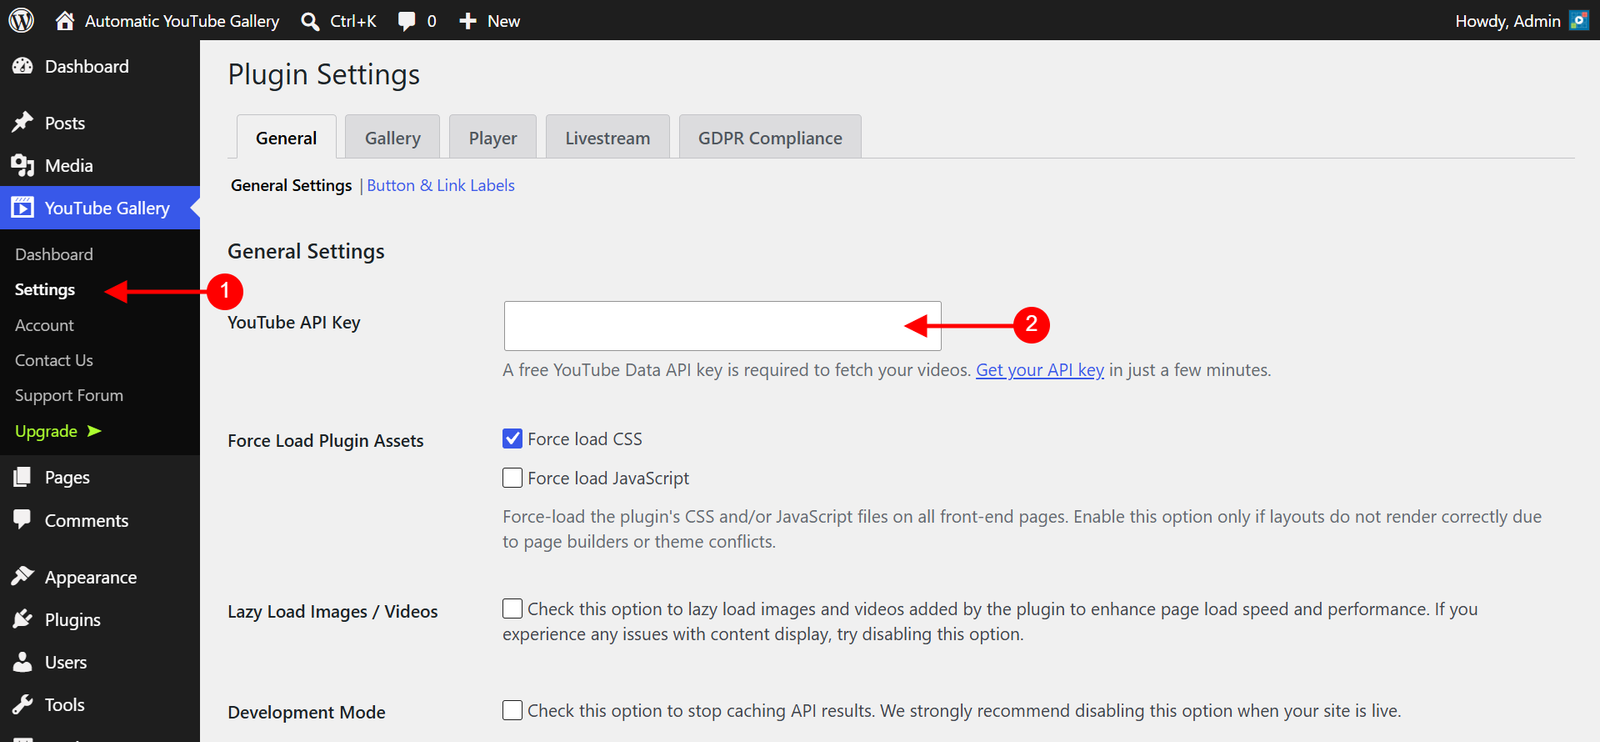
- Navigate to “WordPress Admin Dashboard / YouTube Gallery / Settings“.
- Select the General Tab.
- Find the YouTube API Key field and enter your API Key.
- Follow this link to learn how to obtain your API key.
- Click Save Changes.
That’s it! Your plugin is now set up and ready to build dynamic YouTube video galleries. 😊
3. Creating and Displaying Video Galleries
You can add a gallery in three different ways. Choose the method that best suits your website or page:
- Gallery Builder: Create and manage reusable galleries from the plugin dashboard, then display them anywhere using a simple shortcode.
- Gutenberg Block: Use the built-in “Automatic YouTube Gallery” block in the Gutenberg editor.
- Widget: Add the gallery to any widget-ready area, like sidebars or footers.
3.1 — Add the Gallery Using the Gallery Builder
With the Gallery Builder, you create a gallery once from the plugin dashboard — the plugin imports the video details (titles, descriptions, thumbnails, and durations — not the video files) from YouTube and stores them on your website, then gives you a short, clean shortcode like [automatic_youtube_gallery id="1"] that you can paste anywhere. The videos themselves always stream directly from YouTube, so no storage space or bandwidth is used on your server.
Because these video details are stored locally, your galleries load faster, keep working even during YouTube API outages, and use only a tiny fraction of your daily API quota. The plugin also checks your YouTube source for new videos automatically in the background, so your galleries stay up to date on their own.
Use the Gallery Builder if you use third-party page builders like Elementor, Divi, or the old Classic WP Editor to create your WordPress posts/pages.
Steps to Create a Gallery:
- Navigate to “WordPress Admin Dashboard / YouTube Gallery / Dashboard“. This page lists all the galleries you have created — you can edit or delete a gallery, or copy its shortcode from here at any time.
- Click the Add New Gallery button.
- In the Gallery Title field, enter a name to identify this gallery. This is for your reference only and is never shown to your visitors. If you leave it blank, the plugin names the gallery automatically.
- In the Source Configuration section:
- Choose your Source Type and enter your YouTube source URL in the respective input field.
- Options include:
- Channel
- Playlist
- Username
- Search Keywords
- Livestream
- Single Video
- Custom Videos List
- Note: The video source can’t be changed once its videos are imported, so please make sure you select the right source before saving. You can always create another gallery for a different source.
- Optionally, use the Exclude Videos field to list the video IDs or URLs you never want to appear in this gallery.
- Configure the Import Schedule option (available for the Channel, Playlist, and Username source types).
- Note: This controls how often the plugin automatically checks your YouTube source for new videos and imports them in the background — choose from “Only Once”, “Every Hour”, “Every Day”, “Every Week”, or “Every Month”. Set it based on how often you add new videos to your YouTube account. You can also choose “Pause Automatic Imports” to stop the background imports; the gallery keeps displaying its already-imported videos.
- After setting up the source, click on the Gallery Options section.
- Choose your gallery layout from the Select Theme (Layout) dropdown.
- Note: The Select Theme (Layout) dropdown controls the gallery’s design and appearance. The FREE version includes only the “Classic” template. The PREMIUM version includes additional options like “Popup,” “Slider,” and more.
- Each theme has its own set of configuration fields. When you change the theme, the fields inside the Gallery Options section will update accordingly. Make sure to review and configure these fields based on your chosen theme/layout.
- Use the Order Videos By option to sort the gallery by Published Date, Title, Duration, or even randomly — and the Filter by Duration option to include or exclude YouTube Shorts (videos up to 60 seconds).
- Enable the Deeplinking option (available in the PREMIUM version) if you want the plugin to generate a unique URL for each video in the gallery. This feature improves SEO and allows sharing of individual videos via social media, email, or other channels.
- Choose your gallery layout from the Select Theme (Layout) dropdown.
- After configuring the Gallery Options section, click on the Player Options section.
- Adjust player settings like enabling/disabling player controls, autoplay, loop, mute, etc.
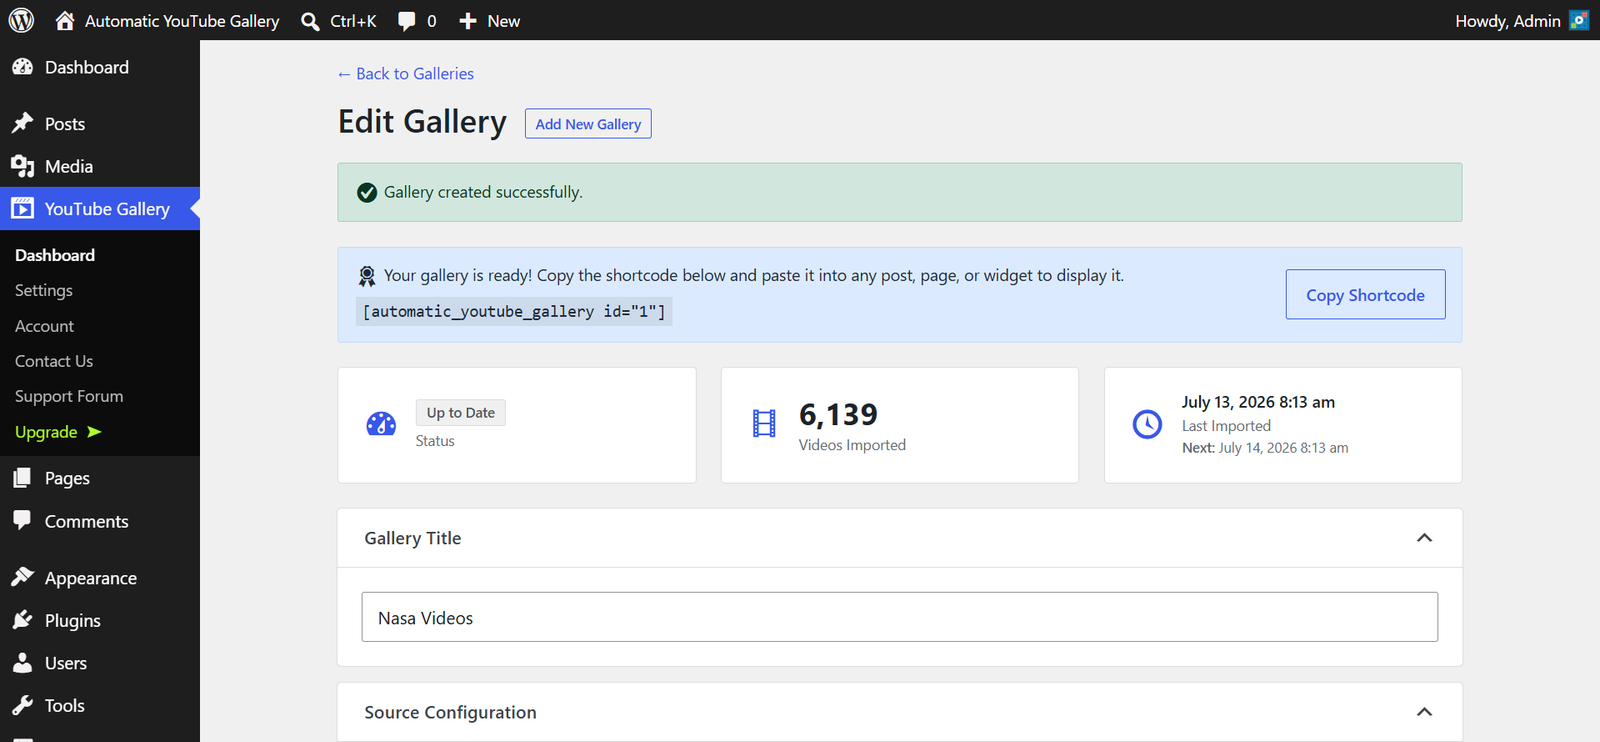
- Click the Create Gallery button. The plugin saves your gallery and immediately starts importing the videos from YouTube, showing a live progress count. Please keep the page open until the import finishes — large channels may take a few minutes.
- Once the import completes, copy the generated shortcode — for example,
[automatic_youtube_gallery id="1"]— using the Copy Shortcode button. - Paste the shortcode into a Shortcode block on the desired post or page and save your changes.
Notes:
- Each gallery has its own shortcode, allowing you to create different galleries with various sources and configurations and display them on different pages.
- Your galleries stay up to date automatically based on the Import Schedule. If a gallery ever looks out of date, open it and click Update Gallery — this pulls the latest videos right away, refreshes changed titles/descriptions, and removes videos that were deleted on YouTube.
- To change a gallery’s appearance without re-importing its videos, uncheck the “Import videos from YouTube now, when you save” checkbox (shown above the Update Gallery button) before saving.
- The Search Keywords, Livestream, and Single Video source types are live sources — their videos are fetched fresh from YouTube when the gallery is viewed (not imported), so they always reflect the latest content. For the Search Keywords type, use the Cache Duration option to control how long the fetched results are reused before checking YouTube again.
3.2 — Add the Gallery Using a Gutenberg Block
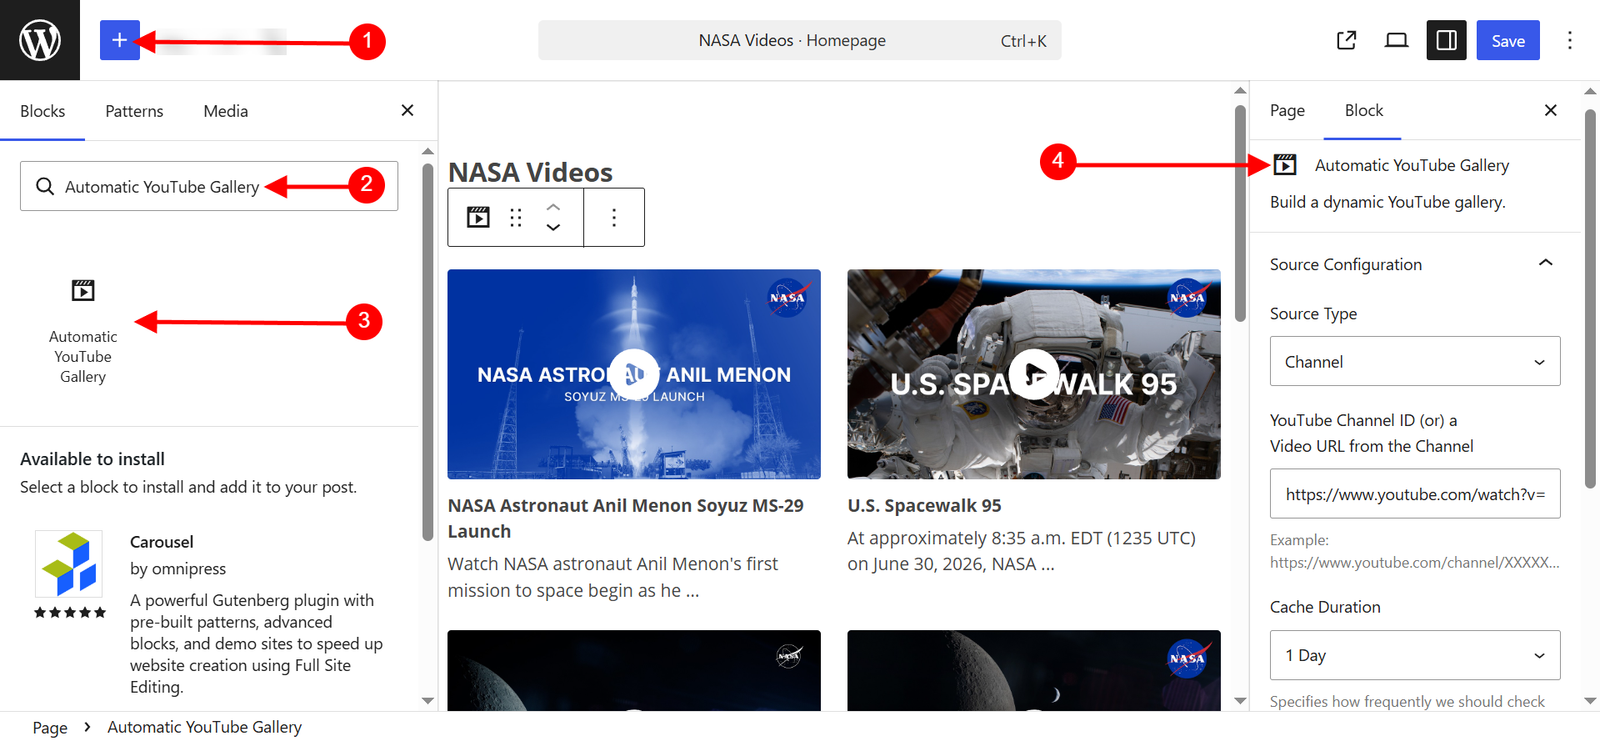
If you’re using the WordPress block editor, you can easily add your gallery by inserting the “Automatic YouTube Gallery” block into a page or post. Refer to the screenshot below:
Notes:
- The “Automatic YouTube Gallery” block offers the same source and display options as the Gallery Builder. The primary difference is that with the Gallery Builder, you create a reusable gallery and add its shortcode to your page or post.
- The block, on the other hand, directly adds the gallery in a visual way, allowing you to see the layout and configuration in real time.
- You can also display a gallery created with the Gallery Builder inside the block editor — simply paste its shortcode into a Shortcode block.
3.3 — Add the Gallery Using a Widget
Widgets are a core WordPress feature that allow you to add custom content to your website’s sidebar or other widget-ready areas of your theme.
You can easily add galleries to your website’s widget areas using the “Automatic YouTube Gallery” widget. Refer to the screenshot below:
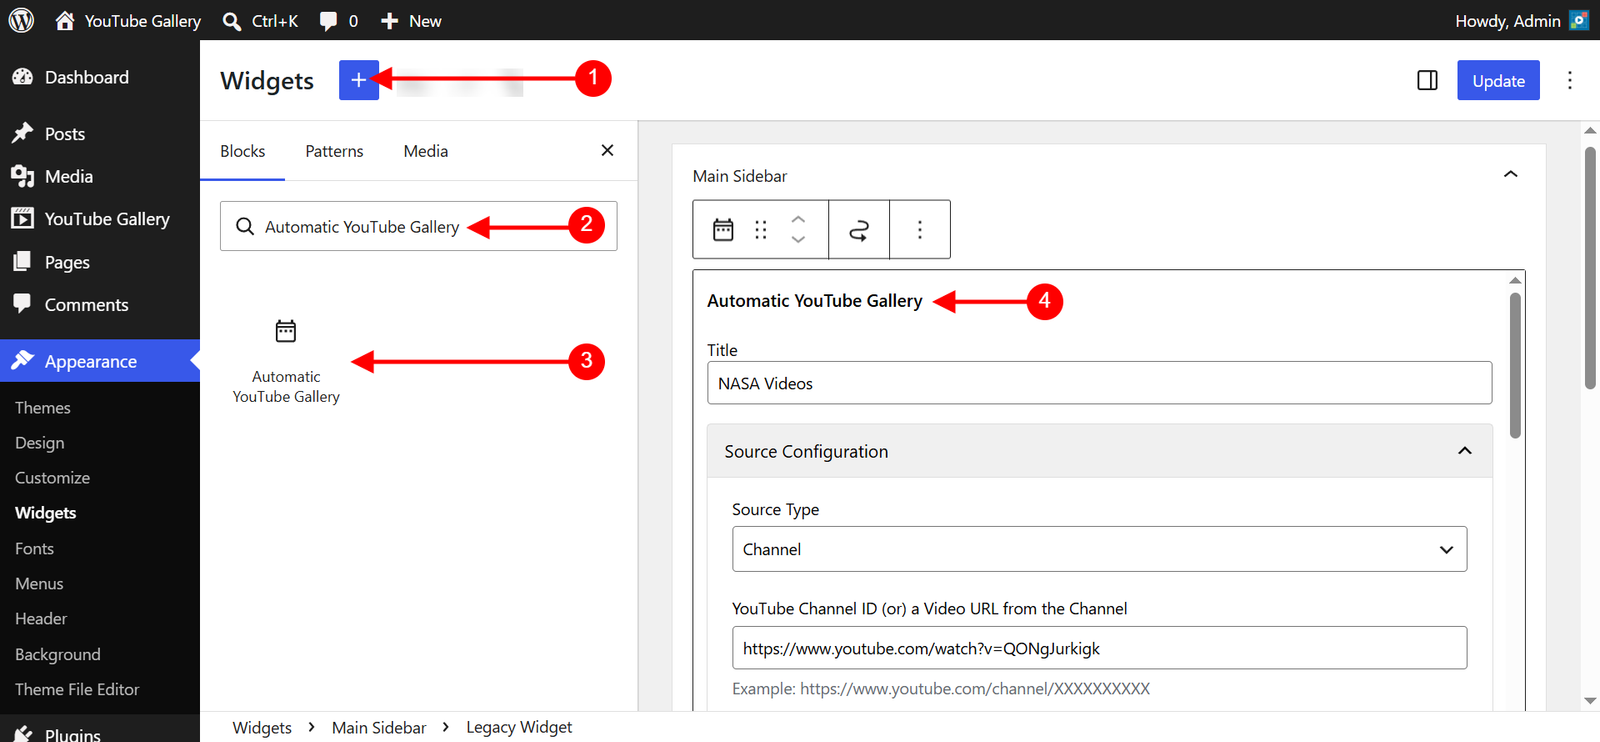
Notes:
- Widget positions are typically defined by your theme. You can use our plugin widget only if your theme supports widget areas.
- The “Automatic YouTube Gallery” widget offers the same source and display options as the Gallery Builder. The main difference is that with the Gallery Builder, you create a reusable gallery and insert its shortcode into a page or post. With the widget, you directly place the gallery into a widget area.
4. Using Premium Gallery Layouts like Popup, Slider, and More
In Automatic YouTube Gallery, the terms “Theme,” “Layout,” and “Template” all refer to the same feature.
The “Select Theme (Layout)” dropdown in the Gallery Options section allows you to configure your gallery layouts. In the PREMIUM version, this dropdown includes additional options such as:
- Classic
- Popup
- Inline
- Slider
- Slider + Inline
- Slider + Popup
- Playlist
Each option in this dropdown comes with its own set of configuration fields. When you select a theme/layout, the “Gallery Options” section in the gallery form will update with new fields specific to the chosen option. Use these fields to customize the appearance and functionality of your selected layout to fit your needs.
5. Frequently Asked Questions
6. Learn by Example: Creating a NASA Video Gallery
A hands-on approach often makes learning easier. Follow the steps below to dynamically build a gallery that displays videos from the official NASA YouTube channel — and keeps itself updated automatically as new videos are published.
Before you begin, make sure you have already configured your YouTube API Key.
Step-by-Step Instructions:
- Navigate to the Plugin Dashboard
- Go to “WordPress Admin Dashboard / YouTube Gallery / Dashboard” and click the Add New Gallery button.
- Enter a Gallery Title
- In the Gallery Title field, type “NASA Videos” (or any name that helps you identify this gallery later).
- Choose the Source Type
- In the Source Configuration section, select Channel from the Source Type dropdown.
- Enter the Channel
- In the “YouTube Channel ID (or) a Video URL from the Channel” field, paste the URL of any video from the channel — for example:
https://www.youtube.com/watch?v=QONgJurkigk - You don’t need to hunt for the channel ID — the plugin automatically detects the channel from the video URL.
- In the “YouTube Channel ID (or) a Video URL from the Channel” field, paste the URL of any video from the channel — for example:
- Set the Import Schedule
- Under the Import Schedule option, select Every Day.
- With this setting, the plugin checks the NASA channel once a day and imports any newly published videos in the background — your gallery keeps itself updated without any manual work.
- Optional Settings
- You will notice two additional sections: Gallery Options and Player Options. These are optional. If you leave them untouched, the plugin will use the global settings you’ve configured. Modify only the fields you need.
- Create the Gallery
- Click Create Gallery. The plugin saves your gallery and starts importing the channel’s videos, showing a live progress count. Please keep the page open until the import finishes.
- Once the import completes, the gallery’s shortcode — for example,
[automatic_youtube_gallery id="1"]— is displayed at the top of the form.
- Add the Shortcode to Your Page/Post
- Click Copy Shortcode and paste the shortcode into your desired POST or PAGE. Check the front-end to view your newly created gallery.
Congratulations!
You’ve successfully built your first dynamic video gallery.